Windows Dynamic-Link Libraries 7
Using Load-Time Dynamic Linking Example
After you have created a DLL, you can use the functions it defines in an application. The following is a simple console application that uses the myPuts() function exported from Myputs.dll (or imported by the application). Because this example calls the DLL function explicitly, the module for the application must be linked with the import library Myputs.lib. For other compilers, to build DLLs, see the documentation included with your development tools.
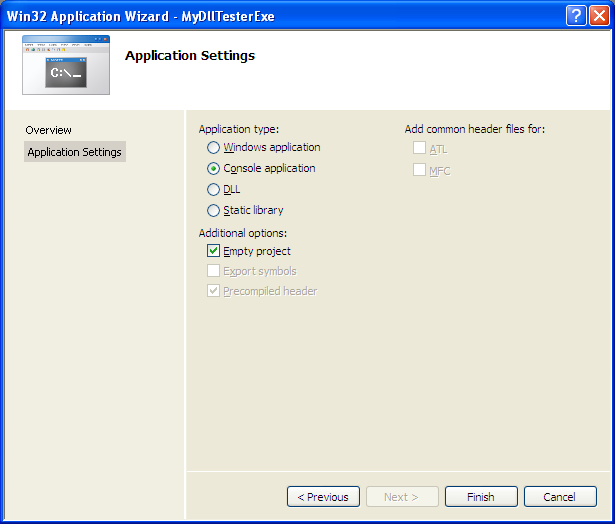
Create a new empty Win32 console application project. Give a suitable project name and change the project location if needed.

Select an empty console mode application project. Click the Finish button.
Then, add the source file and give it a suitable name.
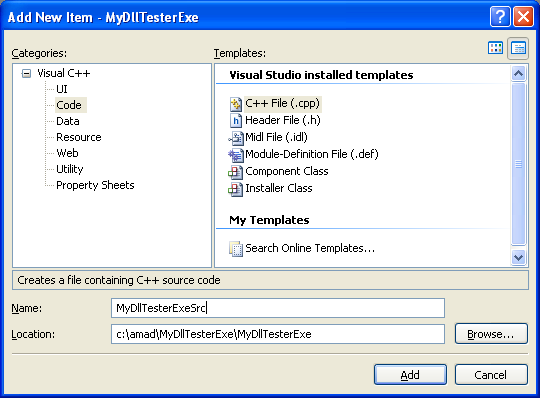
Next, add the following source code.
#include <windows.h>
#include <stdio.h>
// a function from a DLL
extern C int myPuts(LPWSTR);
int wmain(void)
{
int Ret = 1;
wprintf(LIn the executable...\n);
Ret = myPuts(LMessage sent to the DLL function...);
wprintf(LBack to the executable, Ret = %d\n, Ret);
return Ret;
}
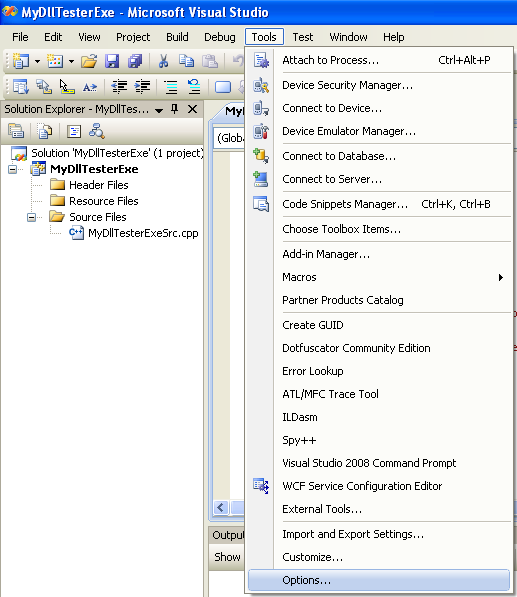
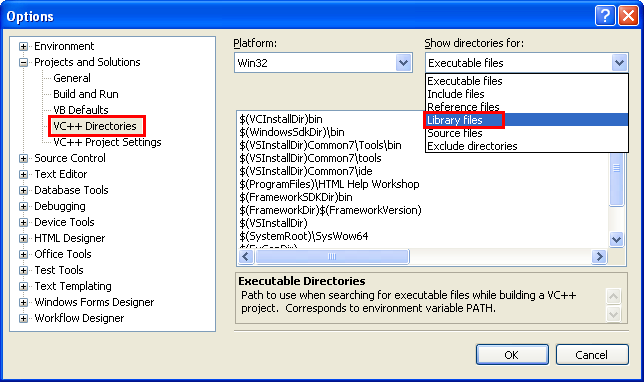
Using Visual Studio IDE, we have two ways to tell the compiler where to find the library file (.lib). The first one is the Visual C++ project wide. In this case invoke the Tools > Options menu.
Select the Visual C++ Directories subfolder for the Projects and Solutions folder. For Show directories for: drop down box, select Library files.
Then add the library folder.
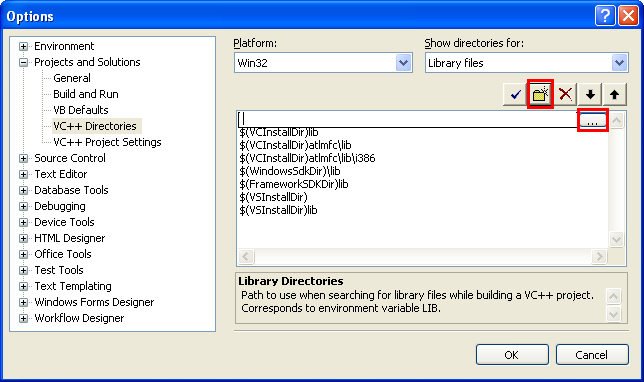
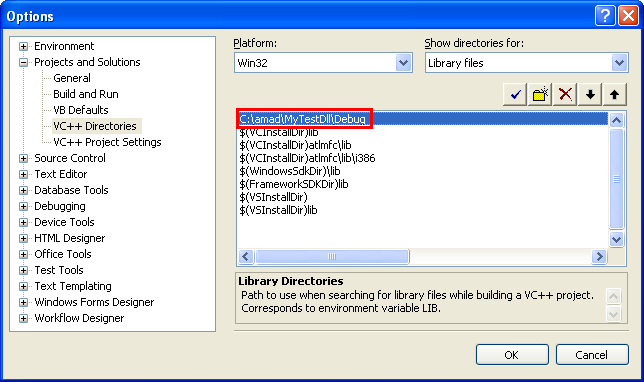
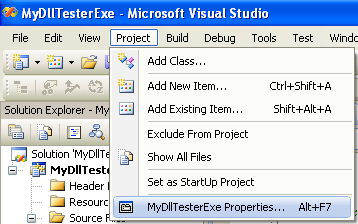
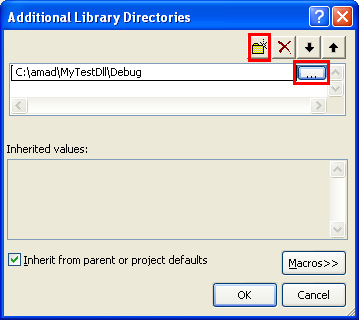
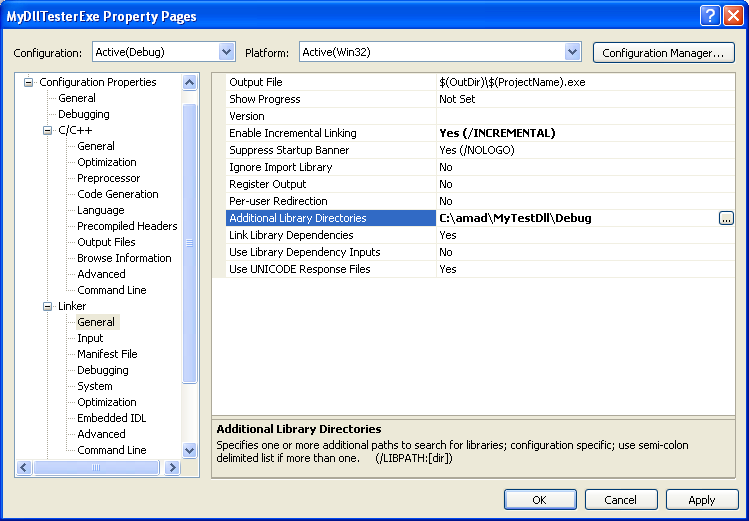
Take note that if your path of the library (lib file) is different, change it accordingly, your project (your machine) should have different path. Another way telling the compiler where to find the library file is through the project’s setting. While the project was opened, invoke the project properties page.
Under the Linker folder, select the General link. For the Additional Library Directories field add the path to the library/dll.

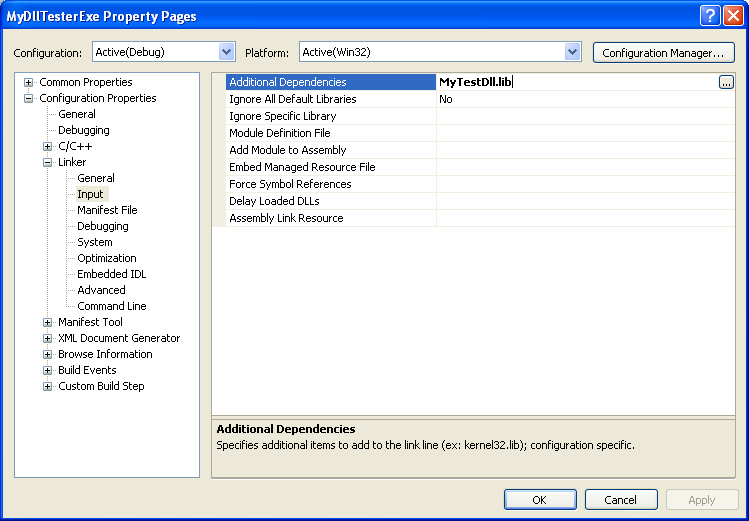
Then, we need to tell the compiler the library file name that needs to be linked. Under the Linker folder, select the Input link. For the Additional Dependencies field, add the library file name. Click OK.
Next, we need to copy the DLL file to the application’s Debug folder (for this case).

Well, now we are ready to run the project. Run the application project.

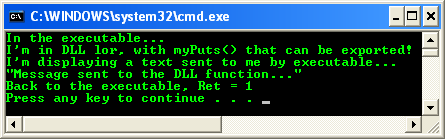
The following screenshot shows a sample output which indicates the function in the DLL (can be exported) was successfully 'imported' by the application program.