The Windows Driver Kit (WDK) 7
Steps on Using WDK and Building Windows Driver from Code Sample
Firstly create an empty directory to store your driver project in C drive. Use a simple path with no spaces in it, just because it is easier to navigate from the command-prompt. For example:
C:\MYDRIVERS\HELLO\
In the HELLO folder create the following subfolders for organizing our project.
SRC – for source code files
BIN – for binary files
LIB – for custom made or extra library files
INC – for include files

Create an empty text file in the SRC directory and call it hello.c, then type the following code into it.
#include <ntddk.h>
NTSTATUS DriverEntry(PDRIVER_OBJECT DriverObject, PUNICODE_STRING RegistryPath)
{
DbgPrint(Hello WDK World!\n);
return STATUS_SUCCESS;
}
The DriverEntry() is a function required by the WDK - it is similar in concept to DllMain() because it is called when your driver first loads - however your driver remains loaded after you return back to the kernel. The two parameters are worth mentioning. DriverObject is a pointer to a DRIVER_OBJECT structure, a kernel data structure used to represent the loaded device driver. RegistryPath() is a Unicode string which holds the corresponding service entry location in the registry. Unlike win32 programs which use BOOL return types, and TRUE and FALSE, kernel drivers use NTSTATUS return types. This is a 32bit value which can hold many different error codes and severity levels. The value STATUS_SUCCESS (which is zero) is used to indicate a successful returns value. Other STATUS_xxx codes can be found in the ntstatus.h header file. Note that, if we return anything other than STATUS_SUCCESS from DriverEntry, our driver will fail to load
Building a Windows Driver Sample
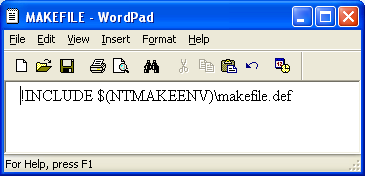
Assuming that you have created your project directory, you need to create two more files which the WDK build utility requires in order to build your project. The first file you need to create is called MAKEFILE - note that there is no extension on this filename. MAKEFILE should contain a single line (shown below):
!INCLUDE $(NTMAKEENV)\makefile.def
and must never be edited in any way. Usually the WDK samples include such a file, so you can copy it straight from there. Use WordPad to edit the file.


Don’t forget to save the file and click Yes for the following warning splash screen if any.

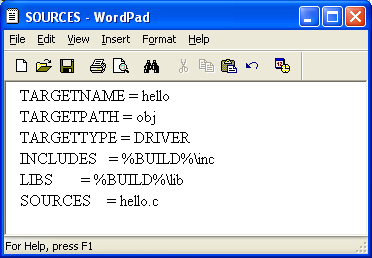
The second file you need to create is your main project file, called SOURCES, again with no file extension. The contents of this file direct the WDK build utility to your source code files. SOURCES contains two important pieces of information - the name of your driver, and a list of source-files. If you have more than one source-file, then they should be listed one-after-the-other on the same line, separated by a space. You have to be careful with filenames that contain spaces (i.e. use quotes), so it is easiest just to use simple names. Put the following codes in the SOURCES file and save it.
TARGETNAME = hello
TARGETPATH = obj
TARGETTYPE = DRIVER
INCLUDES = %BUILD%\inc
LIBS = %BUILD%\lib
SOURCES = hello.c

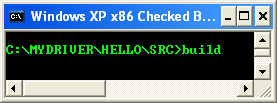
The SOURCES file template can be found at SOURCES file template. Building a driver is very simple once you have created a driver project. At this point you should have three files in your project directory - hello.c, SOURCES and MAKEFILE. Open up the x86 Checked Build Environment for Windows XP (the WDK command-prompt) and go to the project SRC folder and type build.


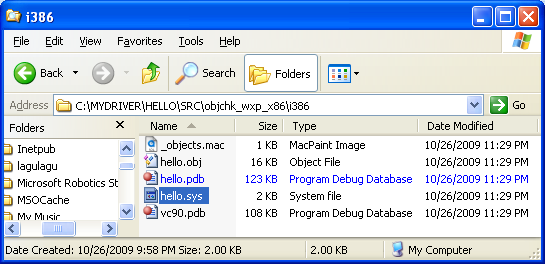
The following Figure shows the created folders and files after the building steps were completed successfully.


< Windows Driver Kit (WDK) 6 | Windows Driver Kit (WDK) Programming | Win32 Programming | Windows Driver Kit (WDK) 8 >